Showing posts with label Recipe. Show all posts

Wednesday, July 15, 2015

Recipe: Tiramisu

Of all the cakes and desserts that I could have chosen to learn first, I chose Tiramisu. Not by choice though... It's actually one of my mom's specialties and I adopted it fairly quickly. By the way, there's absolutely no baking involved in making tiramisu. I hate baking. Therefore, I like making tiramisu. Logic works.


Here's an example of a standing tiramisu cake. I made this last year for my girlfriend's birthday. She approved.

This amazing dessert actually comes in many different forms and styles. Urth Cafe in Los Angeles serves a Green Tea and Earl Grey variety, both of which are amazing. Tiramisu is great because it's not a seasonal item, able to be enjoyed year round. This allows for creativity, to create it with your own personality and twist!

I've made tiramisu in cake form, in deep dish form, and in a martini glass as well! It's actually incredibly hard to mess up this dessert, which makes it perfect for me (considering how much I hate baking)! Essentially, it's a coffee soaked biscuit (cookie/cake/etc) served in combination of a flavored marscapone cheese. In fact, I can argue that the marscapone is the star of this entire dessert. So please, don't buy a skim or low fat version of marscapone.

Let's first talk about the "no baking" part of this recipe. That's actually part of a clever marketing scheme, created by me, to make you interested in making this dessert! There's actually no baking involved, ever, in tiramisu! In fact... taking care of the pastry component is by far the easiest task! I recommend using store bought Lady Fingers, Chiffon Cake, or Angel Food Cake as the base of this dessert.

This is also where our paths can slightly deviate! To create a "standing" tiramisu cake, I suggest not using lady fingers for it does not have enough structure to stand on itself. I somewhat inherited an amazing chiffon cake recipe from my mom (ok, I guess I can bake, but I still hate it!) and with it, can bake a large, fluffy, sponge cake shaped to my liking. This personalization in shape, thickness, and structure is needed to allow your cake to stand upright.

Ok so I lied a little bit, you may need to know how to bake if you decide to make a standing cake as shown above. But if you decide to make tiramisu in the classic bowl/dish/glass method, it simplifies the process! This is definitely my go-to-recipe when I'm in need of a dessert. From start to finish, you can have this tiramisu ready in less than three hours!

Ingredients:
- Cake/Pastry Base
- Espresso/Green Tea
- 1/4 cup Marsala Wine
- 1/4 cup White Wine
- 1/4 cup Sugar + 1 tbsp for whipping
- 1-4 shots Rum/Brandy/Sake (for the Green Tea variety)
- 4 Egg Yolks
- Chocolate (Dark + Espresso, White + Green Tea for combinations)
- 1 cup Heavy Whipping Cream
- 1 lb Marscapone Cheese
- Cocoa Powder/Green Tea Matcha Powder

DO:
- For those of you who want a more fragrant and decadent tiramisu, I suggest adding 1/4 cup more Marsala and 1 more egg yolk (total 5 egg yolks, 1/2 cup marsala).

DON'T:
- Work slow! Temperature is a key factor in this! If you work slow and the ingredients warm up to room temperature, your tiramisu is going to become a slop!
- Skimp out on the Marscapone Cheese! Use the highest quality one you can buy!

Prepare Your Zabaglione

Perhaps the hardest part of this recipe. We must temper and froth our eggs with Marsala and Wine to create zabagalione.


Add your egg yolks, sugar, marsala, and white wine into a large mixing bowl.


Place on top of a double boiler and whisk until you see ribbons. For those of you who have never used the double boiler technique before: Bring a pot filled with 2 inches of water up to a boil. Afterwards, bring the heat down to medium low and place the bowl on top.


The consistency should appear as a medium drip off your whisk and the volume will almost double in size. Once this is done, cover the bowl and chill until cold. This should take 1 hour in the refrigerator.


Prepare Your Cheese

Once your zabaglione is chilled, fold it into your marscapone cheese.


Pastry chefs! Do not yell at me! I know, you're supposed to fold them in batches to keep the fluffy consistency! But I make up for it in the next step! By first folding together the marscapone cheese and zabaglione, we lighten up the mixture for the addition of the next air component!


Whip 1 cup of heavy whipping cream with 1 tbsp of sugar. If you're trying to stretch out or lighten up your cheese mixture, use 2 cups of whipping cream and 2 tsbp of sugar instead.


If you don't have a standing mixer, you can always whisk by hand! 


Be sure that the heavy cream is cold. Warm or room temperature cream will not whip correctly!


Fold the whipped cream into your cheese mixture gently. For those of us trying to make a standing cake, I recommend chilling this cheese mixture for 1 more hour. This firms the mixture up for better cake building.

Prepare Your Cake And Assemble


When I made this tiramisu, I was in desperate need of ingredients. I could not find any quality lady fingers anywhere, so I ended up buying one package of soft lady fingers from Ralphs, and Angel Food Cake. I have two different sets of pictures here, detailing both coffee and green tea varieties.


Layer the bottom of your deep dish.


In this picture above, I did not use enough espresso. I brewed only 2 cups for the entire dessert. I should have doubled this amount. I also prefer using brandy as opposed to white rum as some recipes suggest. 1 Cup of espresso to 1/2 shot of alcohol will do the trick. If using Green Tea, brew Matcha Green Tea (make it potent, with more tea) and add 1/2 shot of sake per cup of tea.


Add in half of your cheese mixture. Make sure to tap your dish onto a towel on your counter to set the cheese mixture and eliminate air pockets. 


Chop chocolate/white chocolate up into bits and layer some on top of your cheese mixture! I prefer high quality dark chocolate, and baking white chocolate (other types of white chocolate melt too quickly when working with it).


Be sure to dust a layer of cocoa powder or matcha powder in between the layers. After assembling, chill your tiramisu for at least 1-2 hours before serving, depending on size. The marscapone zabaglione will firm up, giving a rich, decadent, and fragrant cheese filling. All that's left to do is to serve with a large spoon!

Wednesday, July 1, 2015

Recipe: Guacamole


Ahhh, guacamole... The pinnacle of chips, dip, and summer past times. There are so many versions and methods of how to make this wonderful dish, but few that actually taste good! Many are too thin, bland, processed, or just plain funky tasting. The #1 crime being committed? Too many ingredients!


Chipotle released their guacamole recipe to the public in the past and it surprisingly contained a minimal amount of ingredients. In fact, it's borderline close to seasoned mashed avocados. And the result? Well, with the amount of people raving about it, it speaks for itself.

To understand why less is more in the case of avocados, let us draw upon some comparisons. When we buy a beautiful piece of steak, the golden rule is to let the meat stand for itself. With salt and pepper as the essentials, some can argue that no more is needed. Salt brings out the flavor combination of meat and fat, whereas pepper, garlic, thyme and other seasonings enhance and augment the flavor profiles. To make amazing guacamole, we simply have to change our view of avocados as a fruit, to avocados as a piece of meat.

Avocados are composed of almost 75% fat, as well as many vitamins supplementing healthy diets. Simply said, treat fats similarly. We will season with salt and pepper, and accent the avocados with fragrance.

Let's take a look at Chipotle's guacamole recipe as a reference:

- Avocado
- Lime Juice
- Cilantro
- Red Onion
- Jalapeño
-  Kosher Salt

Simple says it all. Now how about we improve the recipe and change it to our own liking!

Meet the Molcajete
Made of rock solid basalt, this monster will allow you to demolish and pulverize avocados with the same enjoyment as watching a slice of butter melt atop of a stack of flapjacks.


I picked up this molcajete (left) from Costco for a steal of around $25. On the right is a small mortar and pestle from Home Goods for $8, which will work in a pinch and save space. You just won't be able to make as much in one go

Living in California where the avocados are simply amazing every summer, it was definitely worth investing in the molcajete. I highly suggest doing so!

Ingredients:
- 4 Large Ripe Avocados
- 1 tsp Kosher Salt
- 1 tsp Black Pepper
- 1/2 tsp Crushed Red Chili Flakes
- 4 large cloves of Garlic
- Juice of 1/2 a Lime
- 1/4 tsp Cumin
- 1/4 cup chopped Cilantro
- 1/4 cup chopped Red Onion

DO's:
- Be very careful when adding cumin. It's very potent and can be overwhelming if used incorrectly. Start with a smaller amount and work your way up to your personal tastes. I think this ingredient is essential for a much needed earthy fragrance.
- Use jalapeño instead of crushed red chili flakes if you want to. I've found that jalapeños are always a mixed bag of spice levels, so by using the chili flakes I can control the subtle accent of spice more accurately.
- General rule of thumb: 1 garlic clove per large avocado.

DON'T's:
- Juice all of the lime at once. I've found that limes can also have varying levels of potency that can be overpowering also.
- Add tomatoes! I know, it looks pretty and may taste great, but the salt content of guacamole plus the water content of tomatoes will inevitably lead to moisture being drawn out, turning your dip into a sloppy mess!

Mash Away!
Start by adding in your salt, pepper, chili flakes and garlic into your molcajete. The salt and pepper act as an extra abrasive to help mash the garlic, as well as draw out some juices from the garlic cloves.


Grind until you reach a fine, paste-like consistency.


Add in your avocados!


Pulverize! Then add the rest of the ingredients!


I used white onion this time for this recipe because I forgot to buy red onions. So no worries! You can forget also!

Now once everything is mixed together, I highly suggest storing it in the refrigerator for at least 30 minutes. This allows all of the flavors to meld, the salt to draw out more flavors from the onions and garlic, and mellow out the sharpness of each individual ingredient! This chill time is also exactly why I am against adding tomatoes. They will simply bleed all of their liquids out and give rise to a wet, sloppy dip! And don't even think about adding sour cream in this. I mean...why?


To store properly, be sure to press plastic wrap on top of the guacamole in an air tight container. This minimizes the amount of air exposure, decreasing the rate of oxidation of avocados. In other words, to prevent rapid browning.

Enjoy!

Sunday, April 12, 2015

Recipe: Oven Roasted Baby Back Ribs

Ordering ribs at restaurants is always a hit-or-miss ordeal. You hope that your ribs are delicious, succulent, and tender, but they usually come out dry, burnt, and dwarf sized. Those ribs are probably microwaved unless you went to a legitimate BBQ place so save yourself the money and trouble and make a rack of ribs at home for about $10.

A small disclaimer: These ribs are NOT barbeque ribs. They are NOT smoked with charcoal and natural wood. These are oven roasted ribs. But they are amazingly juicy, delicious, and incredibly fun to make and eat!


Ingredients
1 Rack of Baby Back Pork Ribs
Dry Rub of Your Choice
Sauce of Your Choice
1/4 Cup of Water, Apple Juice, or Stock

DO:
-Use St. Louis spare ribs if you can get your hands on them. They are much meatier, just as tender, and cheaper to buy!
-If you have a grill, I highly suggest you finish the ribs off with it after unwrapping. The high heat produced can help reverse-sear the meat and caramelize your sauce!
-Don't have all the spices and ingredients needed for home made sauce and rub? Salt, pepper and store brand BBQ sauce will do just fine! 

The Preparation
Carefully rinse the slab of meat with water, removing bits of bone and blood left on during the butchering process. The ribs will have a gritty feel to them before cleaning them up properly.


Next up, remove the silver skin membrane! Start by inserting the blunt end of a spoon in between the membrane and flesh. Proceed to rip off the membrane and clean up any remaining pieces left.


Finally, be sure to pat them dry! This is crucial for our mustard spread to stick in the next seasoning step!

Seasoning The Meat
Spread a 50/50 mixture of mustard and olive oil onto the ribs. This helps add flavor and moisture to the surface of the ribs.


Season the the ribs, top and bottom, liberally with your dry rub and salt! Be sure to do these steps separately so you can properly gauge how much salt you're really adding in.

I took this picture here halfway thru the seasoning process to show you what I meant by being able to see the amount of salt you're using. If using Kosher or coarse grain salt, they are easily visible and help gauge the amount of seasoning that you're adding.

The Wrap
Wrap up your ribs in foil in such a way that you're folding a boat shaped banana.


Add 1/4 cup of braising liquid: water, broth, or apple juice all work perfectly well. Seal the foil tightly, place on any oven baking pans or trays and cook for 1 hr 30 mins at 350 °F.


You can be sure that the ribs are done cooking when the meat pulls away from the bone and shrinks as shown here.

The Layering Of Sauce
To create a perfect coating of caramelized sauce, we must add the sauce in layers. Remove your ribs from the foil and place on a baking tray. Spread a thin layer of sauce over your ribs. Set your oven to the highest temperature or on high broil. Bake the ribs and do not take your eyes off them! The high heat can easily burn the sugars in BBQ sauce.


First layer of sauce shown above. Take note at the pale color development.


After many layers of saucing and baking, your ribs will develop a delicious color and a thick glazed BBQ sauce on the surface. Due to ovens having uneven heat, you will never achieve a perfect caramelized crust. If you have the time to put these ribs on a grill instead, the results will be many times better!


The only thing left to do is the cut the ribs and serve! Happy eating everyone!


Monday, April 6, 2015

Recipe: Justin's Kitchen Specialty BBQ Sauce

Making BBQ sauce is not easy. For the past two years, I've been tweaking and improving my BBQ sauce with every time that I make it. I've made all the possible mistakes and I definitely still have room to improve. That being said, I am also immensely proud of this sauce!

For some history, I originally planned my BBQ sauce to be free of region-specific traditions. For example, Kansas City BBQ is generally very sweet and candy like. The Carolinas have a vinegar based mop sauce and in Memphis, they forgo sauce all together and use only dry rub! Well, here in Los Angeles, I can do whatever I want. I've taken inspiration from all of the areas and put them together.


Ingredients
1/2 Smoked Onion
1/2 Smoked Apple
Aromatics
2 cloves Garlic
1-2 tbsp of my special Dry Rub
1 Guajillo Chili Pepper
1 Ancho Chili Pepper
1-2 Bay Leaves
Hot Chili Flakes
1 tbsp Chicken Bouillon Powder
Wet Ingredients
2 tbsp A1 Steak Sauce
2 tbsp Ketchup (without High-Fructose Corn Syrup)
2 tsp Dijon Mustard
2 tsp Worcestershire Sauce
3-4 tbsp Maple Syrup
1-3 tbsp Brown Sugar
3 cups water
1 splash of Apple Cider Vinegar
Thickening Agent
1 heaping tbsp of rice

DO:
-If you don't have access to a smoker, use a regular onion and apple instead, but add in a splash of bourbon whiskey!
-Play around with the flavors and taste! Allow the sauce to simmer for at least 30 minutes before adjusting the final flavors.

DON'T:
-Use that liquid smoke bullshit. I mean, what is that?!

The Onions and Apples
One of the very first inspirations I had when making BBQ sauce came from making Japanese curry. To help achieve a sweet and light taste, apples are grated into curry. It helps to add a refreshing flavor in the background, but makes an incredible difference.


I begin by smoking the onions and apples in my smoker using a mix of cherry and apple wood. By doing this, I can naturally impart smokey flavors into the sauce. Do NOT use liquid smoke as a substitute. There's all sorts of who knows what in that bottle.


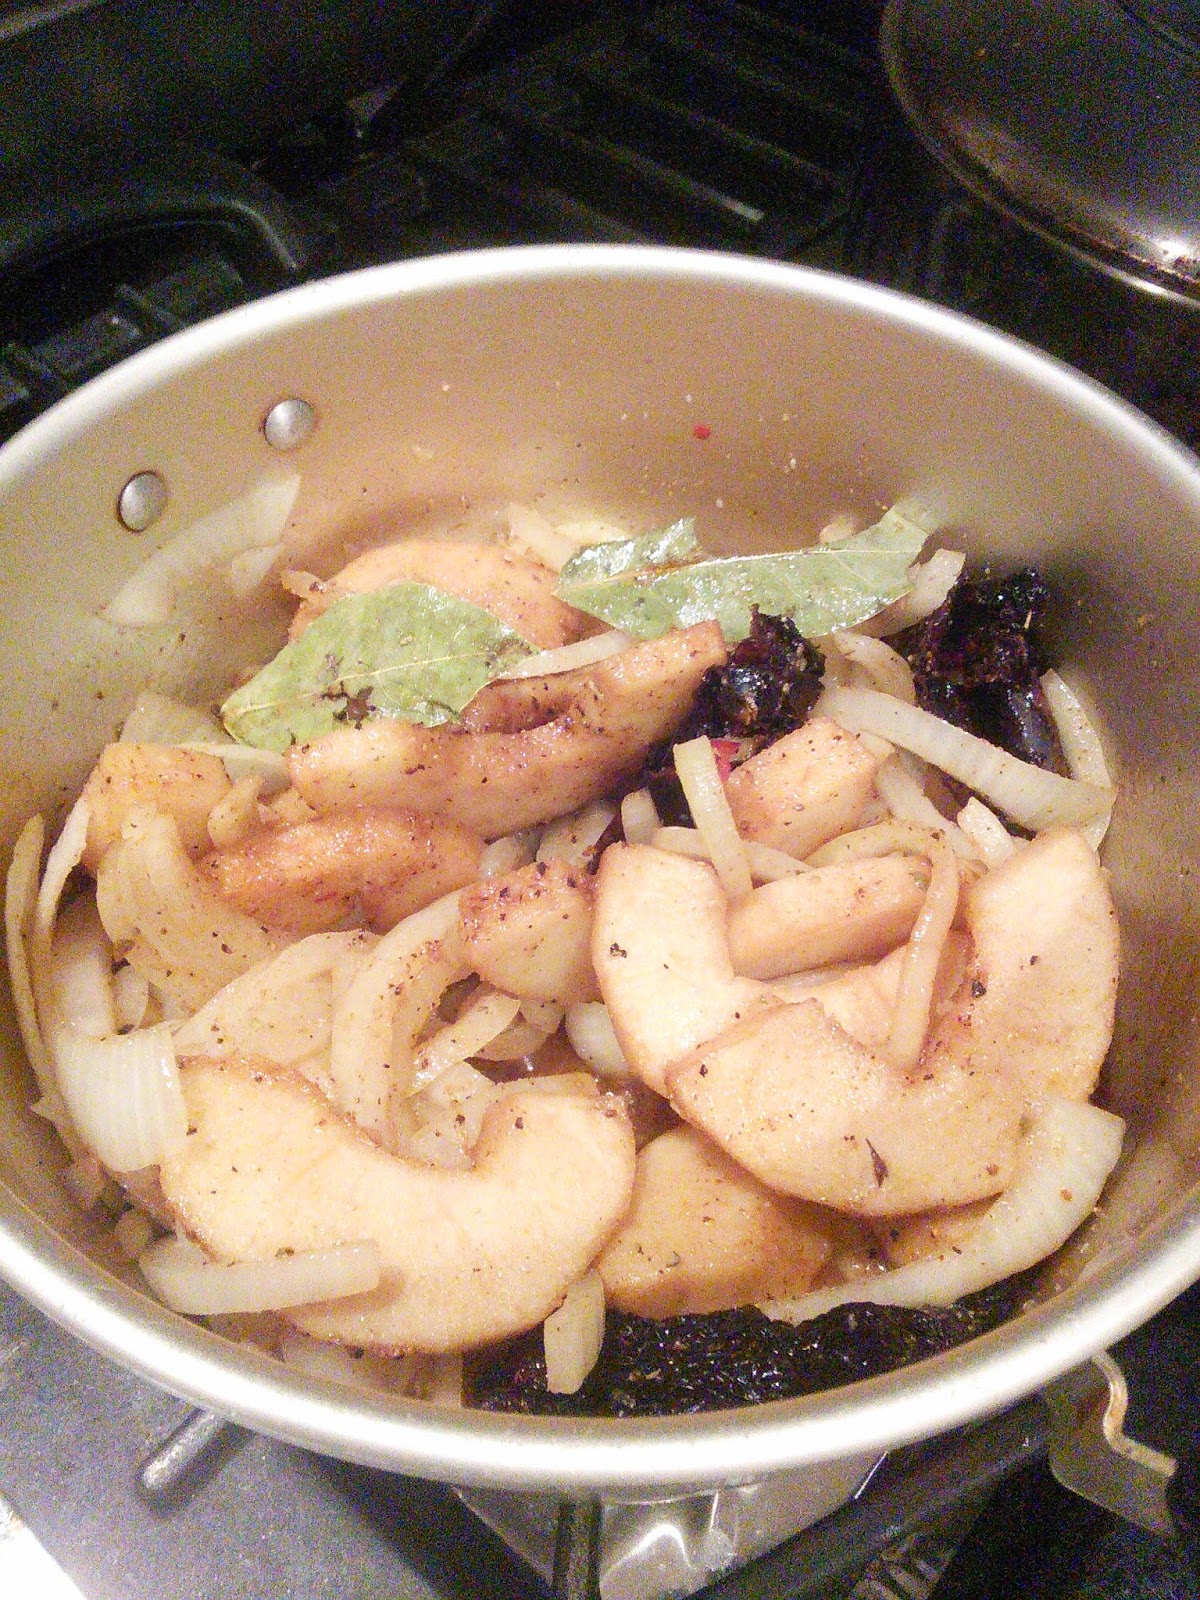
Simply chop up your onions and apples (or grate in the apples) to a pot and stir fry with olive oil and 2 tbsp of your dry rub mixture. The reasoning behind using the dry rub in the BBQ sauce is to unite the flavors of meat and sauce. Sure, that might sound like a load of made up fluff, but I love the way it makes my smoked ribs taste and I shall stand by it proudly.


The Aromatics
After sweating the apples and onions, add the rest of the dry aromatic ingredients. Stir frying the ingredients in this step helps any oil soluble flavors to be extracted from the seasonings (said by someone somewhere...).


The Wet Ingredients
Add 3 cups of water to start, and all of the wet ingredients. Bring the mixture to a boil and simmer for 30 minutes.


If you don't have a smoker (most people don't), try using bourbon whiskey instead! I would not recommend using both smoked ingredients and whiskey, for I feel that may be too many competing flavors.

Adding Rice And Blending
The addition of rice is a very recent development in my sauce. Taking inspiration from making tomato bisque, the addition of rice allows for the thickening of the sauce without changing the taste, shelf-life, or cooking process! A corn starch slurry will eventually break down if kept overnight. Flour needs to be cooked and turned into a rue before using. Too much reduction will result in an overly salty or sweet sauce.

I add my rice after the initial 30 minutes of simmering. Allow the rice to fully cook and become saturated with liquid. After doing the final taste test and adjusting water levels, I remove the bay leaves from the pot and blend the sauce. I use an emulsion blender, but any house hold blender will work!


The final consistency of the sauce should allow it to coat the back of a spoon as shown above.

After much thought, I have finally decided to share my recipe with everyone and to anyone who wishes to learn it. It is surely a lot of work for just sauce, but for anyone who has tasted it, you know just how amazing it is.

There are no added preservatives (only the ones already included in the products used), no xanthum gum thickening agents, no food coloring, and none of those mystery ingredients listed in other store brand BBQ sauces. This is as good as it gets, until I discover something new to change about it and improve it further!

Wednesday, April 1, 2015

Recipe: Justin's Kitchen Secret Dry Rub

The secrets out! I'm going to share my secret dry rub that I use for all of my barbeque, smoked ribs, and pulled pork!

I originally created this with some inspiration from Amazing Rib's Memphis Dust. Although I don't use as thick of a coating as I would need for Memphis styled BBQ, I do believe that the variety of herbs and spices help create a very fragrant and savory bark when smoked or roasted. I recommend using the core ingredients listed below every single time, but the variants are for everyone's own tastes to decide for.


Core Ingredients:
Salt
2 parts Brown Sugar
1 part Black Pepper
1 part White Pepper
1 part Smoked Paprika
1 part Chili Powder
1 part Onion Powder
1 part Garlic Powder
1/2 part Cayenne Pepper
1/2 part Oregano


Variable Ingredients:
1/2 part Ground Mustard
1/2 part Ground Cumin
1/2 part Ground Coriander Seeds
1/2 part Ground Nutmeg
1/2 part Ground All Spice
1/2 part Ground Ginger


DO:
-Salt your meat separately from the dry rub. This allows you to fully control how much salt you use and avoid double salting your meals, especially if you plan to use barbeque sauce.
-I use all of the variable ingredients with the core ingredients combined, but depending on what I am cooking, I may choose to change some ingredients. For example, I would exchange out ginger for sage or fennel.
-Try grinding your own spices! I keep my cumin, coriander, all spice, and nutmeg as whole grains. I also have mustard seeds and fennel whole too, but I don't use them as often.
-Make a little extra to make your BBQ sauce also!

DON'T:
-This is not an all purpose dry rub! I use this dry rub specifically for barbeque and smoking ribs and the sort. Don't use this rub for pan-searing chicken for a normal day's dinner.
-Store the rub for too long. Many of the spices are volatile and lose their potency with time.


Tuesday, March 24, 2015

Recipe/Technique: Justin's Kitchen Sushi Rice Specialty Topping

Today I'll be sharing a special assortment of toppings that I use to complement my homemade chirashi bowls. It's not exactly a recipe, just a list of ingredients. There is absolutely no cooking involved!


Ingredients:
Imitation Crab Meat
Japanese Cucumber 
Japanese Pickled Yellow Daikon
Calamari Salad
Pickled Ginger (Shoga)
Seaweed Salad
Furikake Seasoning
Wasabi 
Kewpie Mayonnaise
White Short Grain Rice
Sushi Vinegar
Konbu Kelp Seaweed

DO:
-Try a variety of substitutions! Try kimchi for a korean flare! 
-Add Masago to your toppings! I normally consider it to be part of the sashimi ingredients though, but don't forget to use it!
-Try the many different types of furikake rice seasoning!
-Buy Japanese Imitation Crabmeat, itakes a huge difference!
-Change my ingredients to anything you want! Try Japanese potato salad!  

The Rice
I use a 1 : 1.25 ratio of rice to water for short grain rice. After washing your grains, soak your rice with the final measured amount of water for 30 minutes. I've found that this softens the grains and allows for faster cooking. For a nice additive, add in a small sheet of konbu kelp while soaking your grains. It adds a subtle, but deep flavor to your rice when finished.


I keep bag of tied up konbu seaweed knots for making soups or broths. They come in handy in these situations.

Once the rice as finished steaming and resting (freshly steamed rice can be very sticky and soft), empty the entire contents into a large bowl. Add your sushi vinegar according to bottle instructions and cut the vinegar into the rice. This means to only use your rice spatula and spread the vinegar into the rice as shown below.


Using this picture as reference, the spatula will only move vertically, "cutting" the rice. This method leaves as many rice grains whole as possible, preventing a mushy texture from forming.

If you're not ready to eat the rice right away, cover the rice with a towel soaked in warm water.

The Imitation Crabmeat
For being just an imitation of meat, there is a huge difference in quality between brands of imitation crabmeat. Try to stick with the Japanese ones, such as Yamasa. The texture, taste, and consistency is just not comparable to knock off Chinese brands.

Shred your crab sticks and season with a tablespoon or so of Japanese Kewpie mayonnaise. The Japanese is much sweeter, creamier, and not as fatty tasting as your normal mayo. Season with just a sprinkle of white pepper to finish (black pepper works in a pinch).


The Vegetables
All we need to do here is to julienne the vegetables. So it's all about the knife technique. Here are some pictures to help with your fine slicing and dicing.


Slice off one edge of your vegetables to have a flat surface. This allows you to both work faster and prevent injuries on the chopping block.


It's fun to play Jenga with your sliced vegetables, but sometimes it's much faster to lay them across in smaller layers for speed. It also prevents the vegetables from slipping and your hand from missing a finger.

The Assembly


All that's left to do is to top your bowl and eat! Start by placing the rice at the bottom. Sprinkle your furikake rice seasoning on top. Layer your assorted vegetables and condiments on top and you're done!