
Two freshly trimmed cuts of beef tenderloin, USDA Choice.
Volume 1: Basics and Food Science
1) Introduction
2) Searing Your Meat: The Maillard Reaction
3) Rare, Medium, and Well-Done
4) The Conversion of Collagen to Gelatin
5) How Meat Actually Cooks: Outside In
6) Introducing Indirect Cooking
*This primer is an introduction to what you're actually doing when you cook meat. There are many more detailed guides available and more qualified individuals to look to about the topic of meat science, but I hope to simplify and compile all of that knowledge to an easily accessible source. Most of what I have learned, I have learned from others and hopefully I can share that with everyone reading this blog. Most of this volume will consist of meat science.*
1) Introduction:
I ran into the most trouble cooking during my third year of college. I always knew my way around the kitchen and can follow a recipe, but I didn't exactly know what I was doing. Why did my pot roast not become fork tender? I marinated this chicken overnight, but it still tastes bland! My ribs are so stringy and tough!
Most recipes available are actually designed for an intermediate chef. Even my own recipe entries are written without a step by step guide. Chop your veggies, season, saute, add your meat, sear, simmer, and etc. They are incredibly simplified and state only what you need to know to cook the dish. If they were to explain the reasoning for every single step of the cooking process, recipes would be essays! Why am I supposed to take out the chicken breast half way through searing and finish it in the oven? What does that do? Can I do it differently? With this meat primer, I aim to fill in the missing dots.
Ultimately, cooking boils down to Food Science. I researched for hours on end to create amazing BBQ and I learned a vast amount of information along the way. For example, you can break down collagen in tough meat cuts to create gelatin. You can find this gelatin anywhere! For example, if you have ever refrigerated food, some of the juices/sauce seem to become a solid gelatin. Taking inspiration from such individuals as Alton Brown, I present to you a simplified version of this food science: The Meat Primer. In this first volume, we're going to talk about the general techniques of cooking meat and what they are actually doing.
2) Searing Your Meat: The Maillard Reaction
Every cook talks about introducing color on your meat. Essentially, we are aiming to produce the Maillard Reaction, which consists of a series of reactions that happens when meat is seared and browned with high heat. It's the difference between eating boiled, grey looking beef and cutting into a seared rib eye steak, with a savory and flavor packed crust.
We're not talking just about incorrectly cooking meat either! Look at the difference between a cut of prime rib and rib eye steak. They are the exact same cuts of meat but cooked differently. Prime rib, known for being extremely succulent, is served with au jus on the side to dip with to enhance flavor and add extra seasoning. This is achieved by roasting a rib roast whole, allowing the meat to slowly come up to that perfect medium-rare temperature. Pan-seared, grilled, or charbroiled rib eye steak takes full advantage of the Maillard reactions to develop a delicious seared crust all around. The crust adds a crisp texture to the surface, enhances the overall beef flavor of the steak, and is the perfect way to introduce aromatics such as garlic and thyme.
Some more examples of this can be seen in something we call Fond. Fond are the bits and pieces of meat stuck to your pan or pot after cooking. Who would have known that a dish washers worst nightmare is a chef's best friend? Fond can be deglazed with any type of liquid, commonly stock or wine, to produce a complex but amazing base for any soup or sauce.
Searing also creates a wonderful Crust on the surface of the meat that we talked about earlier. This crust has had it's water content squeezed out due to the changes in its proteins, concentrating its flavor. It also helps by trapping water content inside the rest of the meat, essentially sealing it in. Not to mention, makes your steak look absolutely gorgeous and drool worthy.
Short and simple? Sear your meat on high heat when first cooking it. Do not overcrowd your pan or pot, for all those extra items can absorb the much needed heat to induce these reactions, or else you end up boiling your meat.

Before wrapping up this tenderloin for beef wellington, I seared the surface to impart more flavor.
3) Rare, Medium, and Well-Done
We all know what these terms mean. Rare means you're a carnivore, Medium is the safe bet in between the two ends, and Well-Done means you're old and don't want to eat red meat...Wait, maybe we're not talking about the same things here.
These terms refer to the final temperature of meat when cooked, producing different textures and completely changing your dining experience. There's not too much to say here about these terms for they are pretty explanatory, so I'm just going to list some temperatures worth knowing.
Beef:
Rare 130 °F
Medium 140 °F
Well-Done 150 °F
Chicken and Turkey:
Breast 165 °F
Thigh 165-175 °F
Pork:
USDA changed (2011) to minimum temperature to cook pork at 145 °F for Medium Rare
*All ground meats should be cooked to well done. I enjoy eating some beef burgers medium-rare, but do so at your own discretion*
4) The Conversion of Collagen into Gelatin
This bit of knowledge took me a long time to come across, partly because it wasn't well documented until food science became popular. Everyone has come across one of two situations:
-This meat that I'm eating is so tough and chewy. It's not juicy, dry, over cooked, or under cooked!
-I'm just going to microwave my leftovers...Wait a minute, all the sauce turned into jello! What sorcery is this?
Meat is essentially muscle tissue. What is muscle tissue laced with? Connective tissue. In particular, we're talking about a protein called collagen. Collagen is what holds meat together (an over simplification). However, we can break down that collagen! At an estimated 190 °F, collagen undergoes a transformation into a type of gelatin, which is packed with meaty flavor and succulent juices!
Let's rewind for a bit. Meat is considered well-done around 150-160 °F! Essentially, to break down the tough cuts of meat, we have to cook them way passed their desired temperature for medium-rare. How do we prevent burning or drying up? This is why braising was developed (you've never heard of medium-rare braising for a reason).
Braising is a technique in which you cook meat in some amount of liquid for long periods of time. Liquid is a great mediator of heat and provides a very gentle method to raise the temperature in meat well passed their limits on the charts. By using this technique, we can achieve our desired temperature of 190 °F!
Some examples of braising are any slow cooker recipes, cooking pot roast in red wine or beef broth, or any type of stewing that involves tough cuts of meats and many hours. For a moment of clarity, have you ever cooked anything for long periods of time without some type of liquid medium to produce anything "fall apart tender"? The only exception I can think of is controlled temperature smoking for BBQ.
Finally, this conversion process is one of the key techniques in making a great soup. Bones are a prime source of collagen, which is why many soups start with some type of bone product. Pork bones in tonkotsu ramen and beef bones in pho are just two popular examples. The gelatin produced ultimately gives the soup a fuller body and slightly heavier feel. Without this process, we'd just be drinking seasoned water!

Shown above is the secret to Xiao Long Bao (mini soup dumplings). I stewed together pork hocks, chicken feet, and pork belly rinds for hours to produce the gelatin needed to essentially solidify the soup at room temperature. When steamed with the XLBs, they melt and become the delicious, decadent soup that we all love. Future blog post incoming?
5) How Meat Actually Cooks: Outside In
This is an easy concept to grasp. We cook the outside of meat, but the outside of meat cooks the inside of the meat.
Confused? Imagine you are roasting a cut of beef. The recipe asks you to take out the meat 10 degrees lower than the desired temperature. We do this because once you take it out of the oven, the outside crust of the meat is still incredibly hot! It will proceed to continue cooking the inside of the meat whether you like it or not!
An important side note: this process is that this sole reasoning of why I will never stuff my meats with other raw meats for roasting. I will never stuff turkey with actual turkey stuffing (but I will stick an apple, onion, and herbs to add flavor from inside out). By the time your meat is cooked, the inside stuffing is practically still raw! Only stuff your meats with cheeses, herbs, or items that are not particularly dense and need to be cooked.
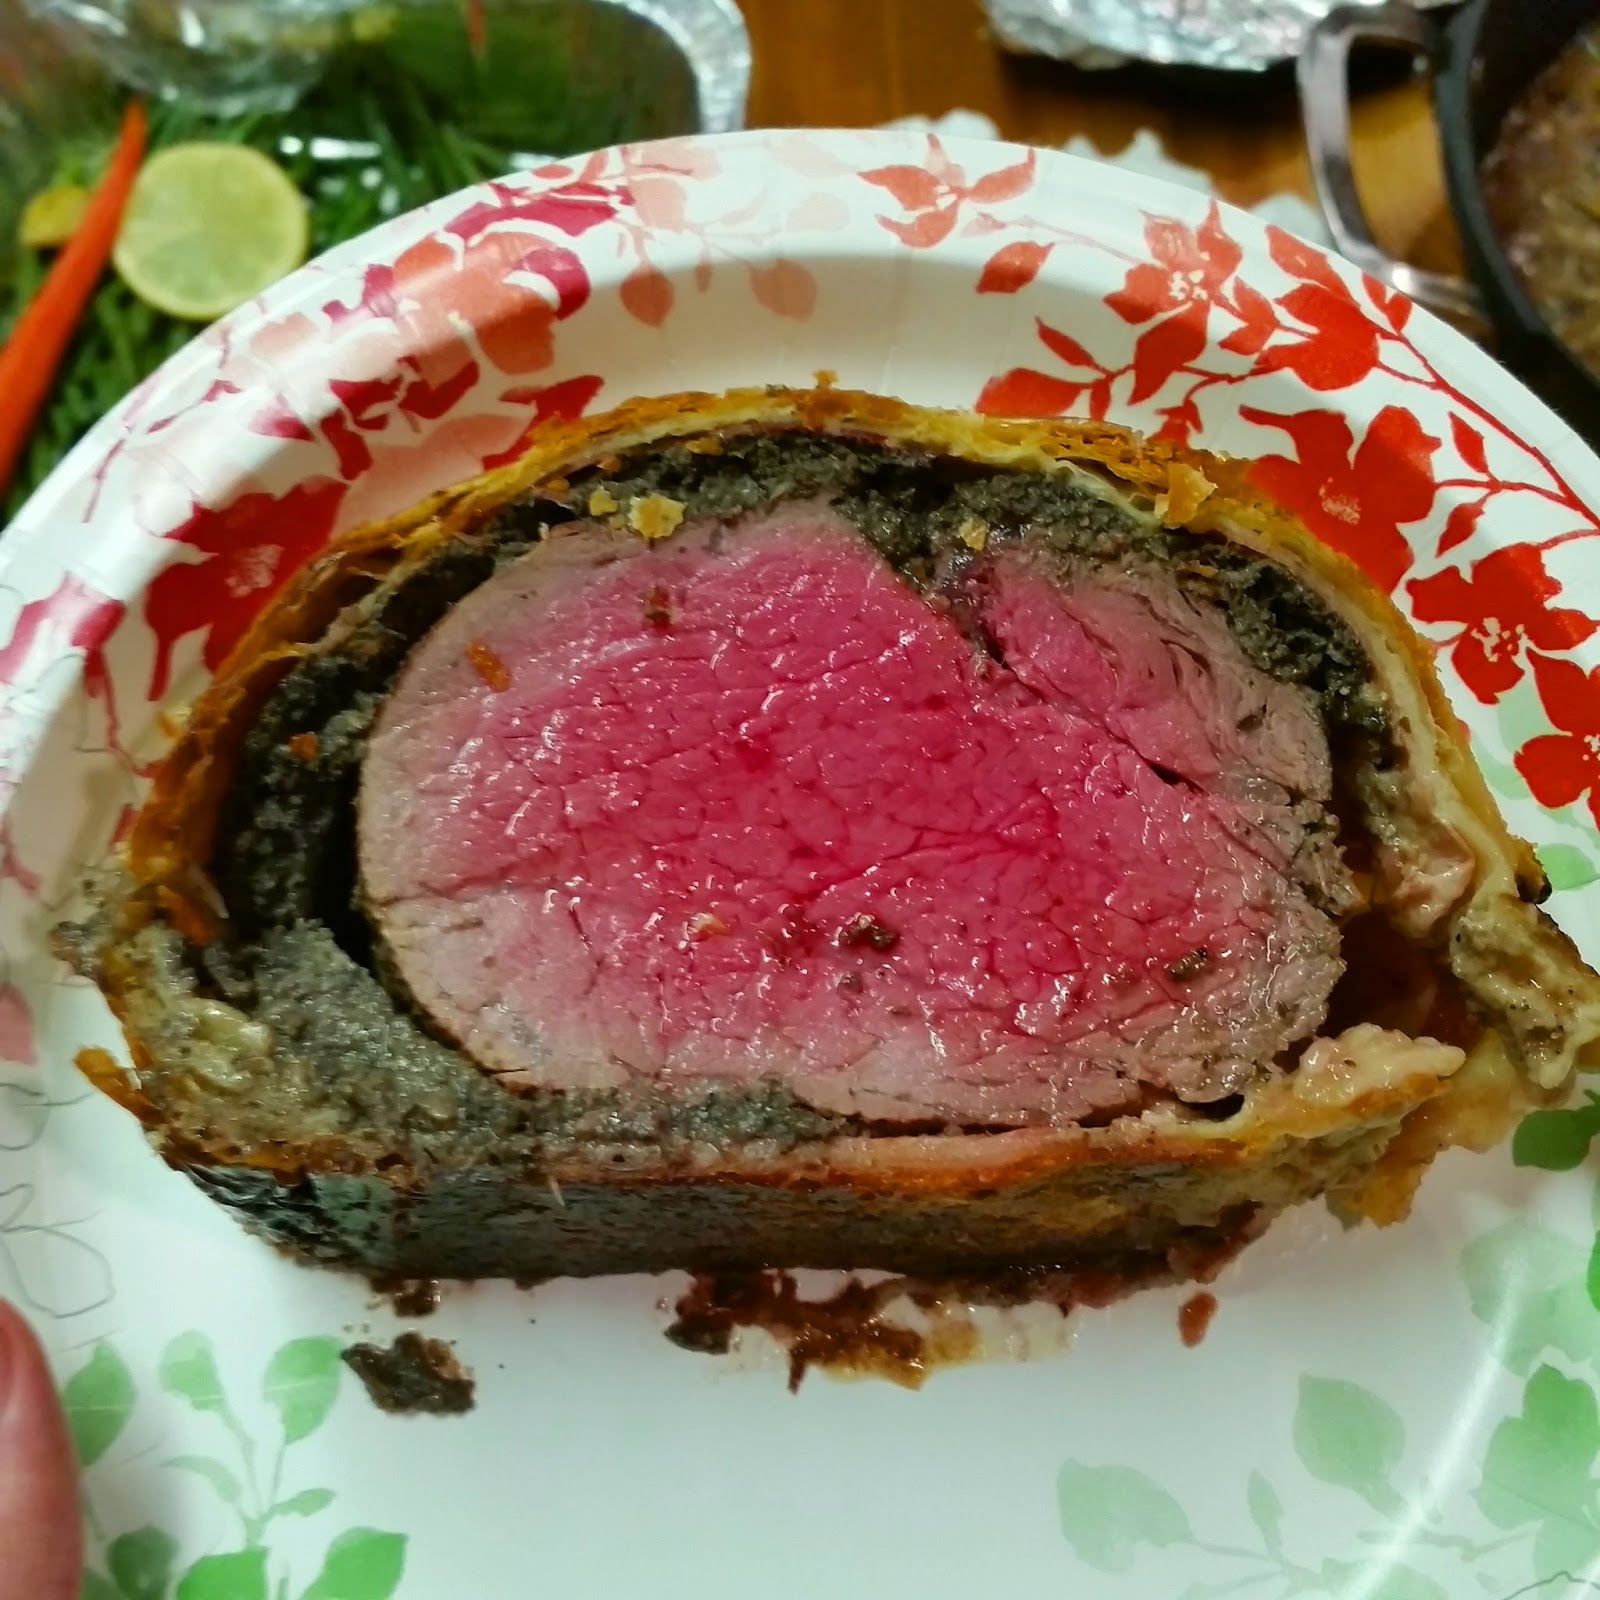
As seen above in this beef wellington, there is a very obvious temperature gradient. The closer you get towards the edge of the meat, the more cooked it is.
6) Introducing Indirect Cooking
One of the great hurdles in cooking the perfect piece of meat is to achieve a great crust, but achieve the perfect medium-rare temperature at the same time. I began to run into a problem with cooking chicken breast. I would create a wonderful sear on the outside, but if I continued to cook the chicken to achieve 165 °F, the outer layers of the chicken breast would be overcooked and incredible tough.
By using indirect cooking, we now have a solution to our problems! We begin by searing our meat the same way, but we finish cooking by using a more gentle form of heat. For example, with chicken breast, I can add chicken stock into the pan, bring the heat down to low, and cover. You will steam and cook all surfaces of the breast slowly, bringing the chicken to the perfect temperature. Or you can transfer your chicken to a rack, and bake it at 350-400 °F until done. By doing this, we are avoiding the direct heat of the pan.
When using a charcoal grill, place your coals only on 1 side of the grill. This creates 2 zones of heat so you can both sear meat directly over the coals and finish with indirect heat. If using a propane grill, they usually have a top rack raised higher than the main grill. Place meats almost done on the top rack to finish cooking, or just set half of the burners to low (or completely off).
In the near future, I'll be posting about my experiences with BBQ and smoking meats. Smoking meats relies solely on indirect heat, using temperatures no higher than 225 °F, therefore is one of the few exceptions to the methods we talked about in this volume.

Here's an example of indirect cooking with 2 zones on a charcoal grill. It's the basis of making great BBQ. Shown here is one of my first experimental batches of bacon. Pork belly brined with maple syrup and seasonings, smoked over cherry wood.
I've simplified a large amount of material and showed some basic examples here, but hopefully I've enlightened you to different techniques of perfecting meat. I encourage you to research more on the matter for the amount of information available out there is incredibly vast. In the future volumes of this primer, I plan to talk about each type of meat individually, as well as proper marinating and brining techniques. I hope you enjoyed your read at Justin's Kitchen!
No comments:
Post a Comment